Stolen Device Protection
 I wrote last year about the danger of a thief stealing your iPhone after getting your Passcode. In iOS 17.3 Apple released a fix for that, called Stolen Device Protection. It is not turned on by default, but you probably want to turn it on, especially before you travel.
I’m going to refer you to an excellent article from TidBITS called, Turn On Stolen Device Protection in iOS 17.3 for the whys. But here is how:
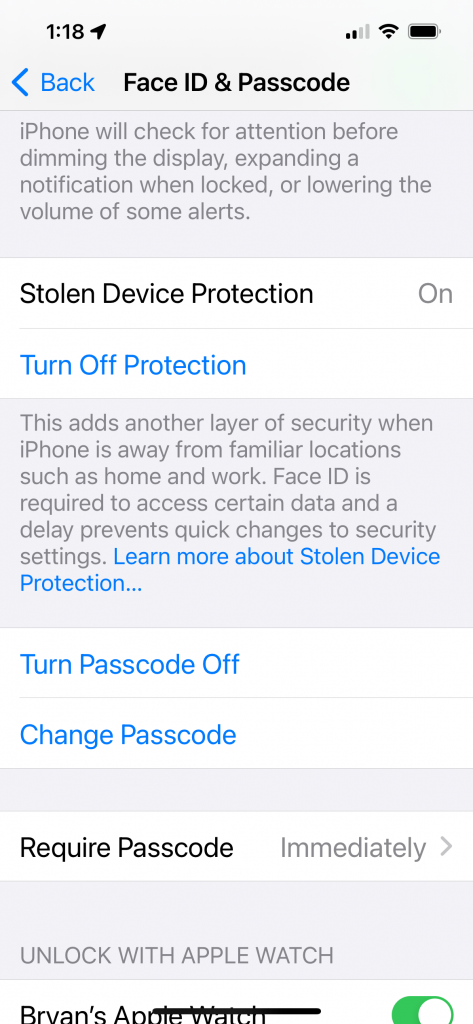
- On your iPhone, go to Settings > Face ID & Passcode (or Touch ID & Passcode on an older phone)
- Enter your passcode when prompted
- Scroll down to Stolen Device Protection. Touch Turn On Protection.
A baddy could still steal your iPhone after shoulder-surfing your Passcode, but they’ll have to wait an hour to change your Apple ID password. That gives you some time to get to another device and lock them out. Recommended.
Apple Camera and Photos
It’s called an iPhone, but for most of us it’s really a camera with cellular connectivity. The camera is the killer app, and photos (videos much less often) are a primary use for our personal “phones” and for our computers when it comes to data we own or manipulate.
Apple adds new features every year. I try to look at what’s new when it comes out, or when I get a new phone. But not everything makes it into habit, and some I never see or just forget. Some do make it into my muscle memory, but I realize others may have missed them. Here are a few things about Camera and Apple Photos that you may have missed.
Opening the Camera App
 Of course, you can launch the Camera app by touching its icon, whether you have it on your home screen or down in the Dock. But if you’re phone is in your pocket, getting to the icon can be a lot of steps. Apple has tried hard to give you several options.
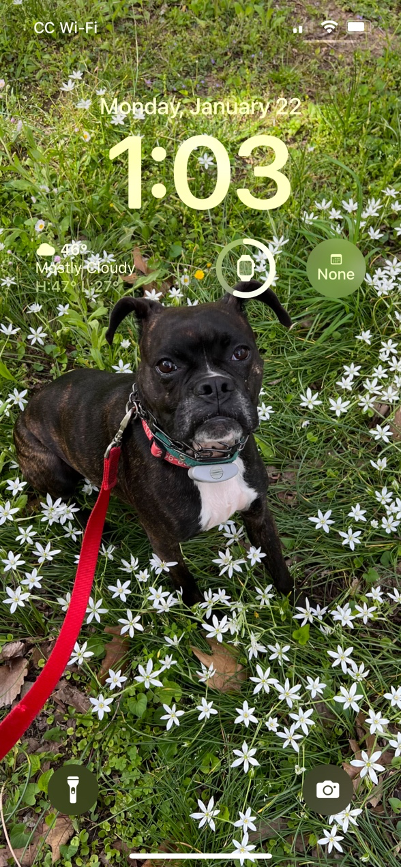
- Lock screen icon

When you wake a sleeping phone with a lift, a tap on the screen, or a button press, there are little icons at the bottom of the phone screen for the flashlight and camera. A push on the camera icon will open the camera app. A tap won’t, so this option can be a tad fussy to use.
- Swipe Left
Alternatively, you can swipe left (from the right edge of the screen) – but you’ll have to avoid any notifications or widgets that may do something different.
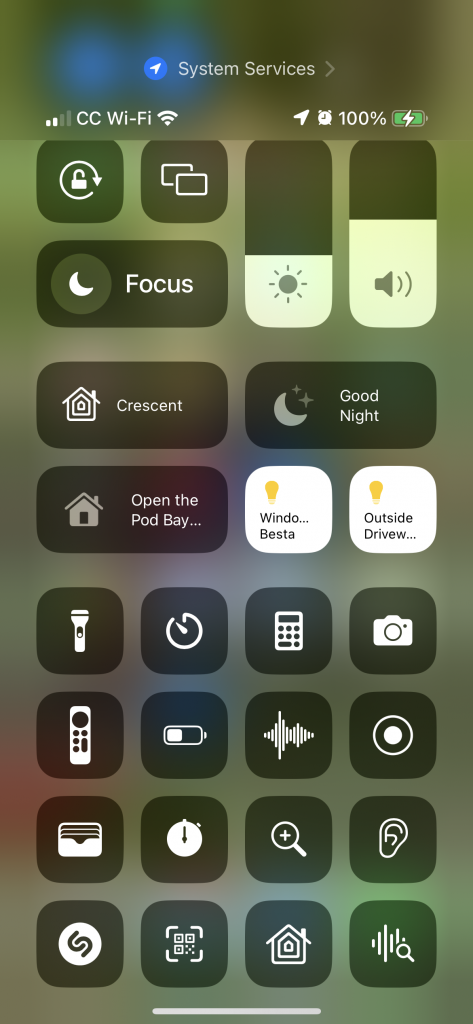
- Control Center

 Open Control Center (normally a swipe down from the top-right edge, or swipe-up from the bottom on older phones), from a locked or unlocked iPhone. Tap the camera icon (this has to be enabled in Settings > Control Center, but is enabled by default).
- Siri
Say, “Siri, Camera.” Siri will prompt you to unlock your iPhone, if it’s locked.
- Action Button
On the latest iPhone Pros there is an Action button that can be set to control the camera. One push will open the camera app, the next push will take a photo.
Syncing
Assuming you are using iCloud Photos, your photos should be syncing across all your devices with no effort on your part. If you have more data than will fit in the paltry 5 GB of storage Apple provides for free, you may need to shell out for an iCloud+ plan (starting at $0.99/month).
Albums
The Photos app keeps a collection of all your photos in the Library, and can help with organizing/sorting in various ways, like by Place, date, event, or recognized faces. You can also manually sort things into Albums.
Shared Albums vs. My Albums
Shared Albums let you share a selected set of photos with others. A regular Album, which gets listed under My Albums, is quite different.
If you drag photos to an (ordinary) Album, you are gathering pointers to content in your library. For instance, a particular picture can be in a Good Times album, in Jenny’s Wedding album, and in a New Orleans Trip album. You can later remove it from the Good Times album, but it’s still everywhere else. If you edit the picture, the edits will show up in all the Albums. If you delete it from the Library, it will disappear everywhere. You can delete a photo from the Library where it shows up in an Album, at least on the Mac – so be careful. The right-click menu provides Remove from Album and Delete options, so know which one you’re selecting. Just hitting the delete key will Remove from Album.
If you add content to a Shared Album, all the content is copied to a new location on iCloud, typically at a smaller resolution than the original. This can especially matter if you, say, take a trip with someone else and Share an album with them before you do edits and deletes. Shared Album content doesn’t count against your iCloud storage limit.
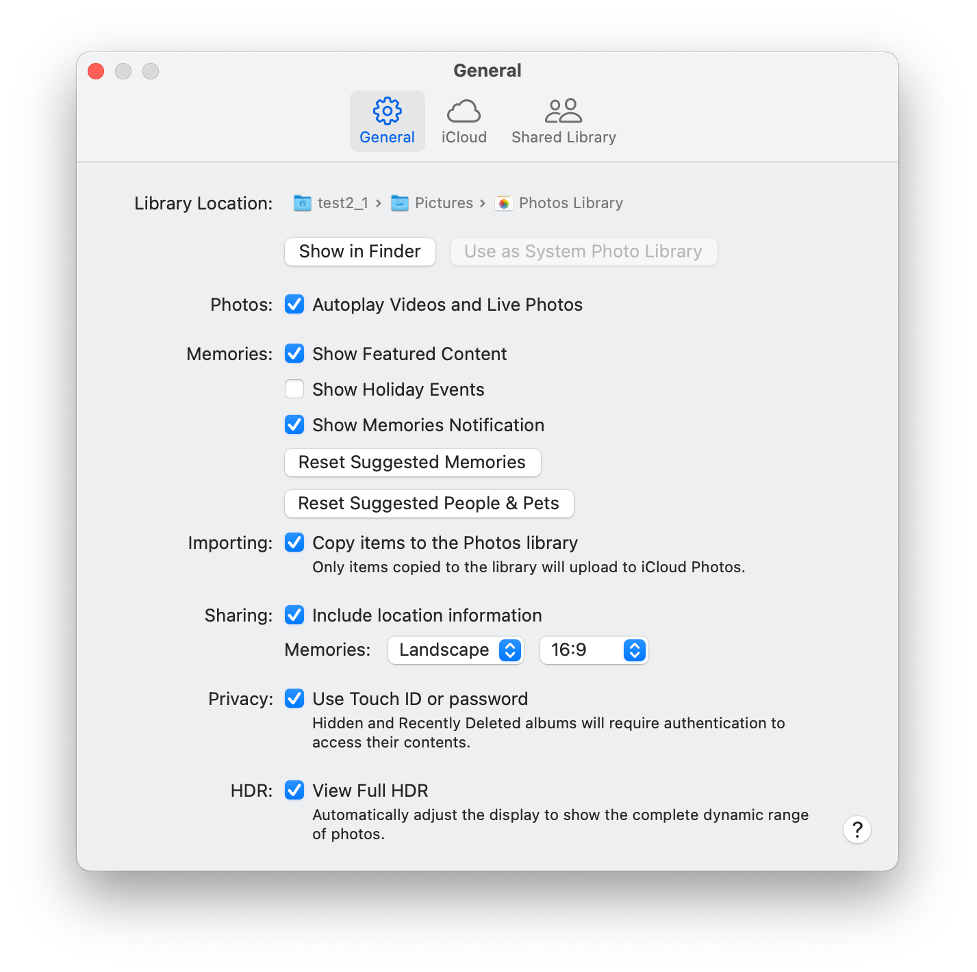
Location metadata is stripped in the copy by default. This may or may not be what you want. You can change behavior in Photos > Settings > General > Sharing.

By default you share to individuals by their email address. If they are in the Apple Ecosystem, they can view the content in their Photos app, or in their browser by logging into iCloud.
If you are sharing to non-Apple folks, you can enable Public Website.

If you want to share photos with someone who wants the highest quality possible with the most metadata, and who wants their own copy of all the photos, Shared Albums probably aren’t the answer, especially if they aren’t Apple users.
Smart Albums and Media Types
The Photos app automatically creates a set of Albums under a Media Types folder that collects all the content from your library that meets a set of criteria: Videos, Selfies, Live Photos, Portrait, Panoramas, Time-lapse, Slo-mo, Cinematic, Bursts, Screenshots, Screen Recordings, and Animated. Each time you take or import a photo or video in one of those categories, it will appear in the appropriate folder.
Smart albums are, for now, exclusive to the Mac. A Smart album is constructed for you from content in your Library, using one or more rules you set up. It’s very much like a saved Search in the Finder, if you’ve ever used that capability. Rules can include membership in other Albums, media types, camera used, people or pets identified, text in the media or associated through tags or captions, and many more. As you add content to Photos, or edit things, Smart Album content will update as well.
Shared Library
Shared Libraries are a new feature from late 2023. Normally each person has an iCloud Photo library associated with their Apple ID. But, within a family grouping (up to 5 people), it’s now possible to have a Shared Photo Library.
My wife and I used this for the first time on our recent Viking Cruise. Photos on our iPhones went directly to the Shared Library, so we could see each other’s photos as soon as they synced.
It’s simple to toggle content from Shared Library to Personal Library or back.
Anyone in the Shared Library can add or delete content. Deleted content goes into a Recently Deleted folder. That gives the original contributor a chance to undelete it, or permanently get rid of it.
You can see and sort by who added content. It seems pretty well thought through. Apple documents how to turn it on.